You can create a Fast Photo Report with a few easy steps as follows.
Step 1. Create a new report by choosing 'New Basic Report' option on the 'Getting Started' menu of the FastPhotoReport welcome screen
Step 2. Enter a name for the new report.
Step 3. Make any needed adjustments to your Report Outline.
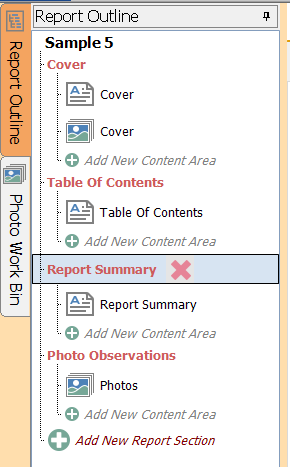
Initially the basic report outline includes a Cover, automated Table of Contents, a Report Summary and a Photo Observation section.
A report outline contains the main heading topics of your report referred to as 'Report Section Headings'. Think of the Sections like book chapter titles. They are the top level items in the table of contents and can also be printed as titles on the report pages belonging to that section. The 'Report Section Headings' contain the actual areas of contents which are referred to as 'Content Areas'. Content Areas can be sections of photos or text paragraphs. The 'Content Areas' also include titles which are listed under its parent Report Heading Section in the Table of Contents and also can be printed as a title at the top of each page of the Content Area. You can add as many Report Section Headings and Content Areas as desired.
To add a new Report Section Heading simply click on the 'Add New Report Section' link at the bottom of the Report Outline Panel (see below). To delete a section Click on the desired section and click the red X to remove (see below).
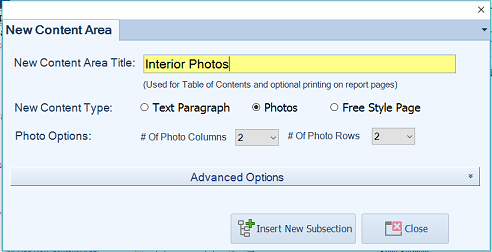
To add a new Content Area to any Report Section click on the 'Add New Content Area' link below that section. The new Content Area dialog will appear shown below. Enter a title for the content area and the type of content you area adding. You can add Text Paragraphs or Photo Content areas. There is also a 'Free Style Page' content option that is available with Enterprise subscriptions. Free Style Pages are covered in detail in its own section here. With Photo content areas you also will choose the number of columns and rows of photos you desire. There are advanced options also available to choose additional content area settings. Advanced settings are covered in more detail in the Screen Overview tutorial sections.