Use the Menu at the top left of the Photo Bin to browse your computer to add photos to the Photo Bin. You can add individual photos or entire folders of photos as described in the previous section.
Select the location where you want to insert the photos (single click).
You can select either an 'Add Photos Icon' or select a photo or photo placeholder to indicate where to add the photos. The photos will be added after the selected item. You select an item by single clicking the item which will be highlighted in orange as shown below.
3. Double Click a photo in the Photo Bin to add it to the report.
The photo will be added after the currently selected item. If you select a Photo Placeholder then the placeholder will be replaced with the photo double clicked.
-- OR --
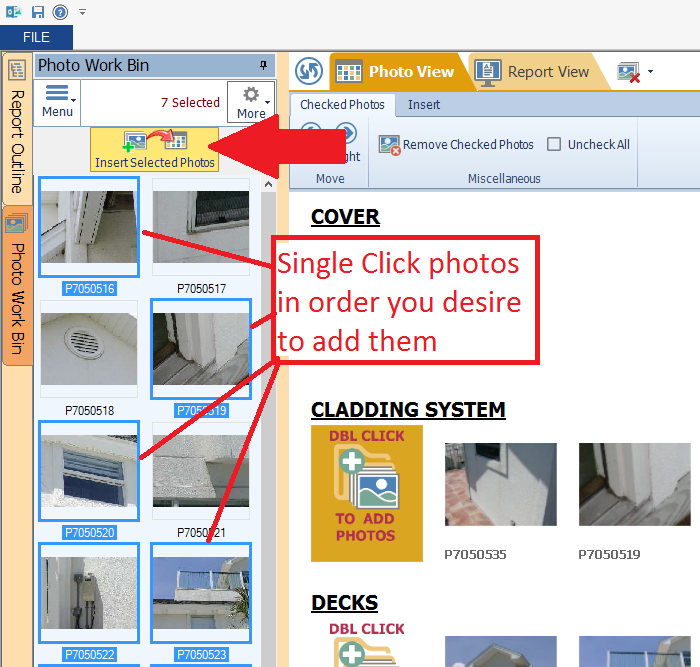
Single Click any series of photos in the Photo Work Bin to select multiple photos and then click the 'Insert Selected Photos' button at the top of the Photo Bin as shown below. ALL of the selected photos in the bin will be added in the order you clicked them immediately after the selected photo or section in the Photo View panel:
After photos are added they will be marked with a red check to indicate they have been used. This is helpful to know what photos you have already added to your report. You can add the same photo several times. You can clear the 'Used Photos' from the Photo Bin by selecting the 'Remove Checked Photos' from the More Dropdown located at the top right of the photo bin. See below:
Using the Photo Bin on the Report View Tab
You can also use the Photo Bin to either Insert a Photo into a photo placeholder or replace the currently selected photo on the Report View as follows:
1. Single click a photo or photo placeholder in the Report View. Selected photos will be highlighted with a Cyan border.
2. Double click a photo in the Photo Work Bin. The selected photo or photo placeholder will be replaced with the photo from the Photo Bin.